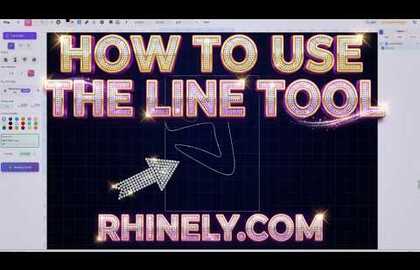
The Line Tool is one of the fastest ways to create custom rhinestone shapes in Rhinely. Instead of starting from a premade library shape, you can click point by point to draw your own outline, finish the shape, and then turn it into rhinestone artwork.
1. Create a design and open the canvas
Start in My Designs, create a new design, and choose the folder where you want to save it. Once the canvas opens, choose a product option so you can begin working.
2. Select the Line Tool
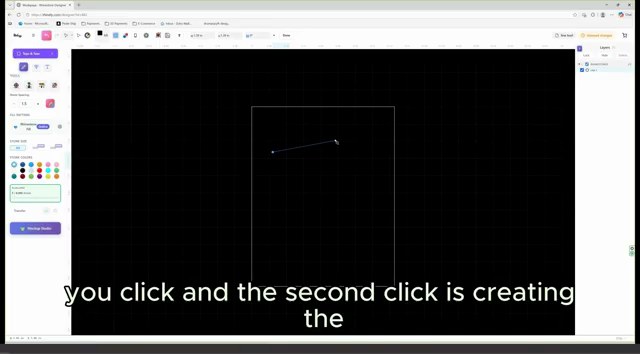
The Line Tool is in the left toolbar. After selecting it, move to the canvas and click once to create the first point. The second click creates the first visible segment. Every additional click adds another connected segment.
3. Build the shape point by point
Think of the Line Tool like placing corners. If you want a simple angled shape, click at each corner. If you want a more rounded result, use more points with smaller changes between them.
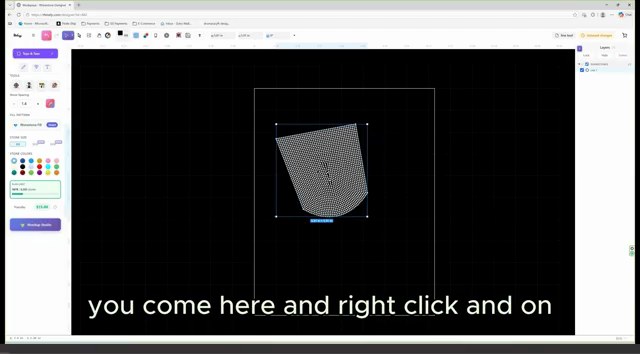
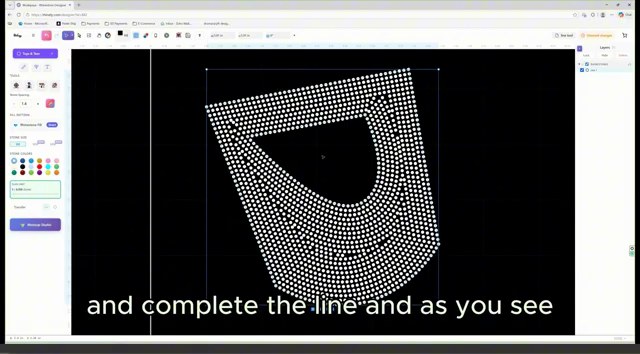
4. Right-click to finish the line
When the outline is complete, right-click to finish the line. This tells Rhinely you are done drawing the current path. From there, select the line or shape and apply rhinestone settings.
5. Turn the line into usable rhinestone artwork
Once the line or custom shape is finished, use the rhinestone fill options that best match the design. For an outline style, keep the stones along the edge. For a filled shape, test a smart or grid-style fill and adjust spacing until the stones look balanced.
Line Tool checklist
- Pick the Line Tool from the left toolbar.
- Click once to set the first point.
- Click again to create the first segment.
- Continue clicking to build the custom outline.
- Right-click to finish the line.
- Select the finished line and apply the rhinestone fill or outline style.
Watch the matching lesson
Leave a comment
Your email address will not be published. Required fields are marked *
Related Articles

How to Add Text in Rhinely and Turn Fonts into Rhinestone Designs
A beginner-friendly text tool guide showing how to choose Google Fonts, set spacing, convert text to rhinestones, apply text effects,...
Read guide
Rhinely Basic Tools Part 2: Lines, Text, Brushes, and Fill Styles
A walkthrough of the second Rhinely basic tools lesson covering line drawing, the shape library, Google Fonts text, manual stones,...
Read guide
Rhinely Basic Tools Part 1: Selection, Images, Grid, and Collision Checks
A practical recap of the first Rhinely basic tools lesson covering selection tools, image import, workspace controls, grid visibility, overlap...
Read guide